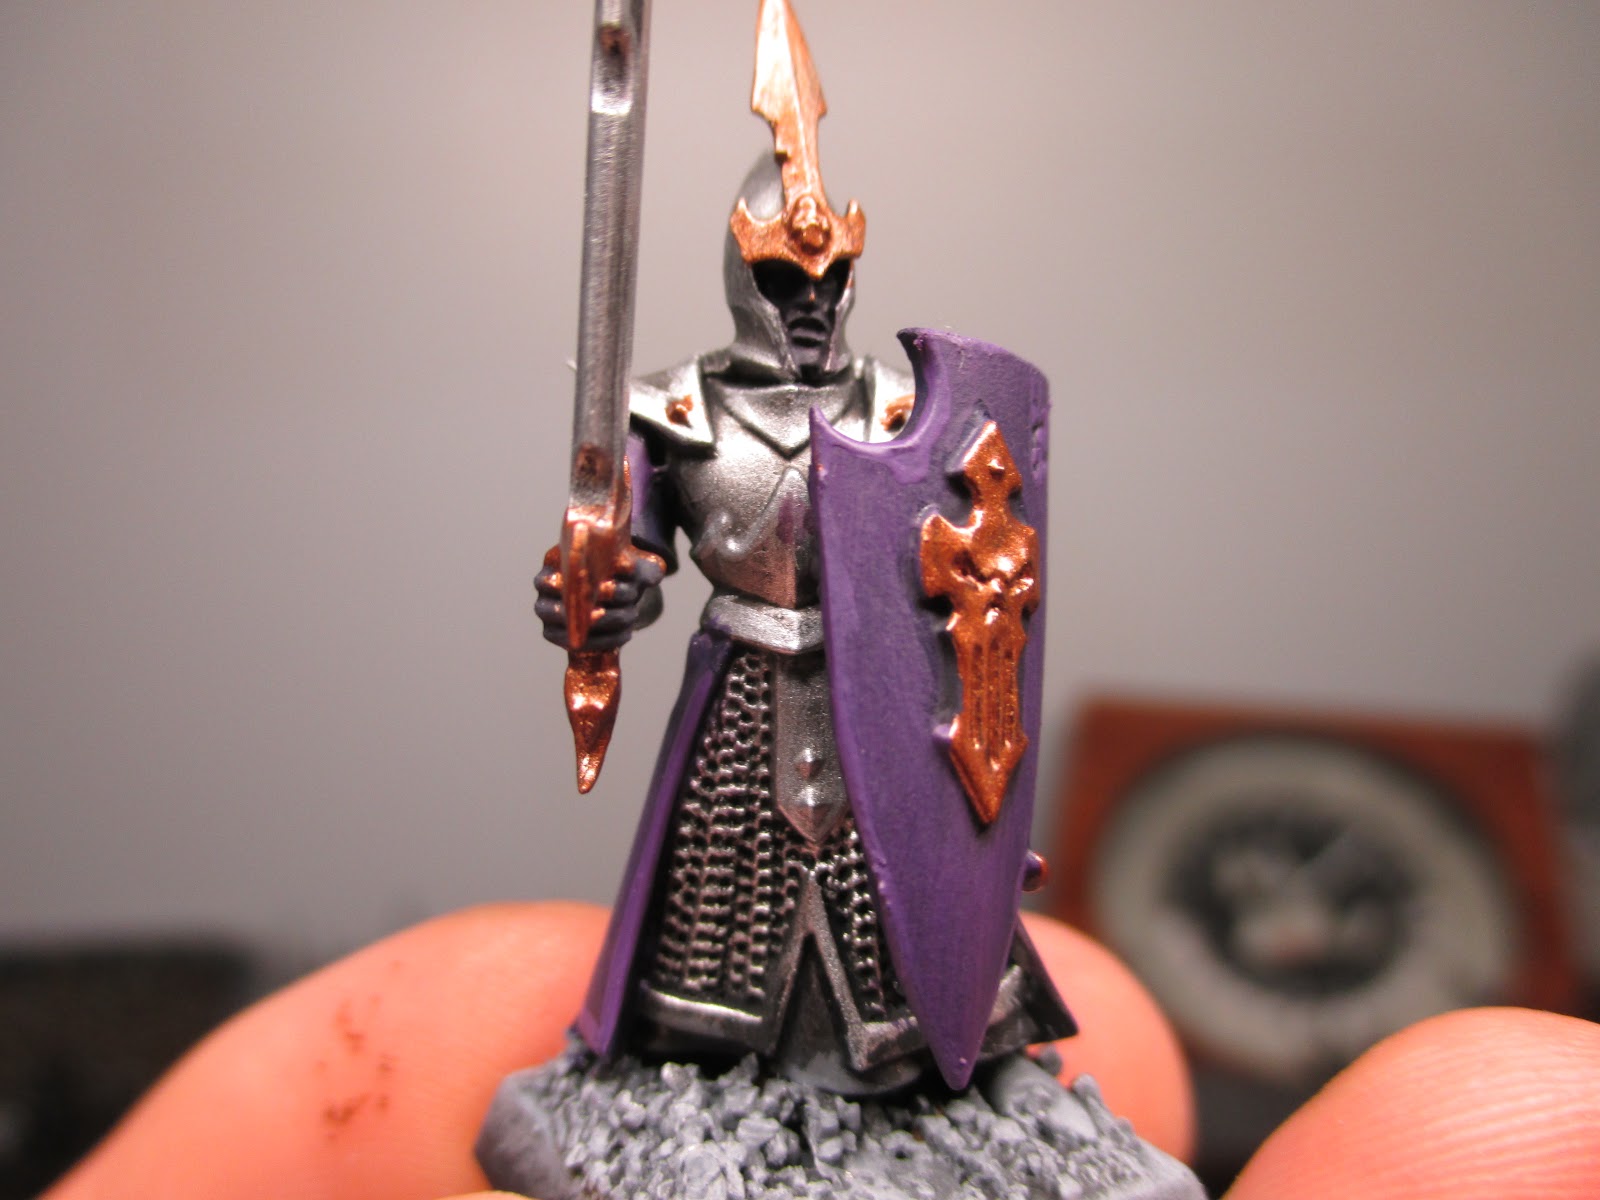
I'm notoriously bad at blogging regularly (one thing I hope to change in the new year), so I've actually managed to sit down three times since my last post and do some hardcore painting. After I finished the silvery metals last article, I moved onto the purples.

I painted a base of Naggaroth Night, followed by a Druchii Violet wash. After the wash was dry I did a Xereus Purple/Naggaroth Night mix as a first highlight, then a Xereus Purple/Genestealer Purple mix for the final highlight. Though in the picture shown above, I don't think I completed the final highlight at the time.
The skin was done using Reaper's paints. They have a fabulous little line of paints that I like to dip into every now and then. They're especially cool because they make use of what they call "triads," which Citadel borrowed for their current line of paints. The "triads" are three paints that work with one another to create a good shade, base, and highlight combination. This one was the "Dark Elf Triad" which consisted of Dark Elf Shadow, Dark Elf Skin, and Dark Elf Highlight (in that order. Though I did a Druchii Violet wash after I painted on Dark Elf Skin that I won't be repeating further... Too dark). I did this combination in the same sort of format as the purples—that is, mixing them together instead of painting a brighter color overtop. I don't have a hard-and-fast ratio for this; I simply just mix until it looks right, then self-correct if it doesn't.
The golds were next and they were super satisfying to paint as always. They were done with a Balthasar Gold base, then a complete cover-up of Gehenna's Gold. No gold I've used covers too well except for Balthasar Gold which I don't like as a color. That's why I cover it right up again with Gehenna's Gold. I did an Agrax Earthshade wash then an Auric Armour Gold highlight without mixing. I don't like mixing metallic paints.
Now the figures are practically finished (it's what I love about the new Dark Elf kits, they're not overly complex). I did some of the little bits around them such as the black skirts and shoes (Abaddon Black sans any highlights (shh! No one will ever notice)), and the little red trim around their chainmail skirts (Khorne Red base, Carroburg Crimson wash, Khorne Red/Wild Rider Red highlight, then a little bit of Wild Rider Red on the tips and edges).
The fun part is their hair. I like painting hair because it brings these models together and contrasts well with their black skin. Also the hair makes it look like I'm intentionally painting them as drow, and not just leaving the skin deep in their helmets dark to cut corners. The hair was a Fenrisian Grey basecoat, followed by a straight layer of White Scar.
The only thing left was to paint the eyes (White Scar, then Abaddon Black pupils), and the little belt straps that they have hanging (Doombull Brown basecoat, with a straight Tuskgor Fur highlight on the edges of the belts). I also painted the banner pole a Dryad Bark base followed by a Dryad Bark/Steel Legion Drab highlight.
I tidied up the bases, glued some Burnt Grass static grass flock from Woodland Scenics on some parts using P.V.A. glue, and then stuck one of the decals that were included with the box on my standard. I didn't choose the symbol for any particular reason besides the fact that it matches the color of the banner's trim and it was thin and simple, so would look good on the thin banner.

+++
A note on decals: One of the questions I get asked a lot as a hobby shop clerk is regarding the proper application of decals. I begin by cutting out the decal I want with an X-Acto blade and soaking it in water for about thirty seconds to a minute. You don't want to soak it too long, otherwise the decal will just separate and you might as well throw it out (though I'm such a decal pro that I've saved a couple of these). The shape you cut it in should be a square with enough room around the decal itself, so as to allow a pair of tweezers access to the piece without them touching the decal proper.
Just before I take it out of the water, I apply some Humbrol DecalFix to the area I want to apply the decal to. Then I use tweezers to pull the decal out, brush the decal onto the area I want, and gently dab the perimeter of the decal. While I'm doing this, I'm constantly re-adjusting the decal with my brush, as absorbing the water can cause the decal to shift.
At the time the completed regimental photo was taken the decal was still wet and I hadn't applied the second coat of the DecalFix, but after the water has dried off a little, I'll apply the aforementioned second coat of DecalFix. This takes off the edges of the decal, which often show through when everything's said and done. It also deals with some of the shine.
+++
That's about it for this time. My next article will deal with the Cauldron of Blood I received for Christmas, and all the good stuff that came outta that!
Here's the breakdown for this entry:
Naggaroth Night - $5
Druchii Violet - $5
Xereus Purple - $5
Genestealer Purple - $5
Balthasar Gold - $5
Gehenna's Gold - $5
Agrax Earthshade - $5
Auric Armour Gold - $5
Abbadon Black - $5
White Scar - $5
Fenrisian Grey - $5
Dryad Bark - $5
Tuskgor Fur - $5
Steel Legion Drab - $5
Doombull Brown - $5
Khorne Red - $5
Wild Rider Red - $5
Carroburg Crimson - $5
Dark Elf Shadow - $4
Dark Elf Skin - $4
Dark Elf Highlight - $4
Humbrol DecalFix - $6.99
P.V.A. Glue - $10 (which I forgot to add to last entry's breakdown, so I'll add it here)
Burnt Grass Static Grass Flock - $12.99
Cauldron of Blood/Bloodwrack Shrine - $90
Citadel Under-Empire Basing Kit - $40
As always, please patronize your local brick-and-mortar hobby shop before hitting the web for supplies and models.
Time spent since last update: 7h 20min
Total time spent: 9h 57min
Money spent since last update: $130 ($131.98)
Total money spent: $245.49 ($299.93)
+++END TRANSMISSION+++